Kecepatan halaman website atau blog adalah elemen penting dalam menentukan pagerank mesin pencari situs Web Anda. Belum lagi, situs yang lambat menyebabkan pengunjung malas. Jika anda ingin mmempunyai website wordpress yang cepat anda bisa menggunakan MaxCDN dan W3 Total cache, namun menggunakan MaxCDN itu berbayar, tapi Pada artikel ini, saya akan menunjukkan cara untuk mengatur CloudFlare CDN gratis di WordPress. Tapi jangan berharap kecepatan website anda menjadi lebih cepat diberbagai negara jika anda menggunakan layanan hosting yang jelek. Saya menyarankan anda untuk mencoba menggunakan hosting murah, cepat, unlimited di ipage.
Apakah CloudFlare?
CloudFlare pada dasarnya adalah sebuah Web Application Firewall, proxy server terdistribusi, dan jaringan pengiriman konten (CDN). Ini mengoptimalkan website Anda dengan bertindak sebagai proxy antara pengunjung dengan server Anda yang membantu meningkatkan keamanan dan melindungi situs Anda terhadap serangan DDoS.
Mereka menawarkan rencana dasar gratis yang cocok untuk website kecil dan blog. Mereka juga menawarkan rencana dibayar mulai dengan $20 per bulan.
Untuk setup CloudFlare, hal pertama yang perlu Anda lakukan adalah untuk mendaftar untuk sebuah account. Kunjungi situs CloudFlare dan klik pada link Signup dan isi email, username dan password anda seperti gambar dibawah ini dan klik create account.

Masukkan nama website nama website anda.

Configure your record, tunggu beberapa saat setelah selesai, lalu continue.

Setelah anda klik continue diatas maka berikutnya akan tampil configure DNS seperti dibawah ini
 Lakukan Settings choose a plan menjadi 0$ seperti dibawah ini.
 Dan yang terakhir akan muncul settings DNS seprti dibawah ini.
 Note : di bulatan merah diatas yang sebelah kiri current name server adalah name server anda yang asli, dan yang sebelah kanan adalah name server dari cloudflare, silahkan ganti name server anda dengan name server milik cloudflare.
There are hundreds of WordPress SEO plugins available in the WordPress.org plugins depository courtesy of numerous selfless and great WP developers who have invested their time, energy, resources and intellect into the development of these SEO plugins.
But, due to the volume of SEO plugins that are available, it is a bit difficult for bloggers, especially newbie bloggers, to know which and which SEO plugins is suitable for their blog.
To be Candid, not all WP SEO plugins are good, in fact, there are some that will break/mess up your blog and your search engine rankings if you ever try to use them. So, in other to prevent such occurrence and help you in selection of SEO plugins, I have decided to share with you some tested, trusted and effective WP SEO plugins that you can try out on your blog.
Without much ado, let us meet our Top 10 WordPress SEO plugins.
#1. All in one SEO Pack
One of the most popular and most widely used WordPress SEO plugin is the All in one SEO Pack plugins. This plugin is well known for its simple interface and ease of use; AIO SEO is very compatible with almost every plugin and it is absolutely less buggy.
This plugin will handle the overall SEO of your blog ranging from: META Descriptions, Page Titles, META Keywords, Indexation and so on. This plugin is my favorite SEO plugin, I use it on all my major blogs; AIO SEO can also automatically generate META descriptions for your posts and optimize your titles for search engines.
This plugin also enables you to manually include META tags (title, description and keywords) for each Post/page on your blog. This is one plugin you must have on your blog.

#2. Google XML Sitemap
Google XML sitemap is also another SEO plugin that is very very very important, this plugin will create a XML sitemap format for your blog, this sitemap will help Search engines to crawl your blog easily and index every content on your blog.
Do not be deceived by its name, Google XML Sitemap plugin is not just for Google, the XML sitemap created is supported by Google, BIng, Yahoo and Ask search engines. Google XML Sitemap plugin will also notify all major search engines very time you publish a new post or update your blog.
The settings is quite easy to configure, it is just a matter of ticking and un-ticking some boxes.

#3. SEO Friendly Images
SEO Friendly Images is a SEO plugin that will help you to optimize your blog images for proper search engine rankings. If you don’t know, images on your blog can be a source of huge traffic for you blog and this plugin will help you to achieve this.
SEO friendly images plugin will automatically update all your blog images ALT and TITLE tags. The ALT tags acts as the image description while the TITLE is the text displayed when the mouse is hovered on the image. These two attribute are important part of you blog SEO that you must not ignore.
#4. SEO Post Links
SEO Post Links plugin is a plugin that will help to shorten your blog post permalinks/URL. Usually when you create a new posts, the posts slug will be the whole of the post title which is bad for SEO, but when you have this plugin installed, it will automatically cut off unnecessary words and make your posts URL short and Search engine friendly.
I will recommend this plugin for all bloggers, especially newbie’s.

#5. All in One Webmaster
The All in One Webmaster plugin is a nifty plugin that is very useful for all bloggers; this plugin makes your blog verification across various major platforms a breeze.
With All in One Webmaster, it is very easy for you to verify your blog with Alexa, Google Webmasters, Google Analytics Click and lots more.
It also helps you to submit your sitemap to search engines.
#6. Redirection
Redirection is a plugin that helps you to manage 301 redirections, to keep track of dead links 404 error pages and also to correct them. It also allows you to monitor your redirects by giving you full logs of all redirected URLs and also RSS feed for 404 errors.
It also, automatically adds a redirection when a posts permalink/URL changes.

#7. NoFollow Link
NoFollow Link plugin will let you set the nofollow attribute tag for links within your blog posts. This plugin will add a button to your post editor top pane which you can use to add “nofollow” attributes to any links within your posts; this plugin will come handy when you have a post that deals with external links like this one.
It is important for you to control your on page link juice flow, so make sure you use this plugin to your advantage. Just select a link in the post and click the No Follow button, and the nofollow attribute will be added to the link.
#8. Automatic SEO links
Automatic SEO links plugin is a plugin that help with automatic linking of words and phrases in your blog posts. This plugin is quite easy to use, just choose a word and a URL and this plugin will replace all matches in the posts of your blog.
Automatic SEO links also let to set the link Title, target, and rel. You can also choose whether the link should be “Nofollow” or “Dofollow”.

#9. SEO Blog roll
SEO Blog roll will be of help to bloggers that are making use of the WordPress blog Roll feature. This plugin will let you control which blogs on your blog roll that link juice are passed to. The plugin will let your add “nofollow” to any link on your blog roll.
This way, you can conserve your link juice and blog page rank.
#10. Digg Digg
We all should know by now that social media now has a part to play in our SEO campaigns this is why I will be adding this plugin to this list. The Digg Digg plugin lets you add all major Social Networks and Social Bookmarking sites sharing buttons to your blog.
A good demo of this plugin is the floating sharing buttons at the left-hand side of this blog. Search engines are now taking notice of social media trends in their search rankings, so make sure you add this plugin so that it is easy for your readers to share your posts.
]]>
Meningkatnya jumlah pengguna internet mobile membuat pasar baru yang penuh dengan peluang. Kini sebanyak enam miliar orang di dunia memiliki ponsel. Ponsel tersebut bisa basic, bisa juga smartphone. Di sisi smartphone kini makin banyak perangkat Android yang beredar setiap hari. Google sebagai pemilik Android mengklaim bahwa perangkat Android yang diaktifkan setiap hari di seluruh dunia mencapai 1,3 unit per hari. Perangkat tersebut sebagian besar adalah smartphone dan tablet yang mampu mengakses internet secara mobile.
Jumlah tersebut tentu belum ditambahkan dengan perangkat mobile yang dirilis oleh RIM BlackBerry, Apple, dan Nokia. Hal ini menjadikan internet mobile sebagai salah satu primadona pengguna smartphone dan tablet. Sebagian besar pengguna smartphone dan tablet pasti mengakses internet sehingga mereka perlu dilayani dengan sangat baik.
Google mengatakan bahwa pada tahun 2013 nanti orang yang menggunakan ponsel lebih banyak daripada pengguna komputer desktop (mungkin saja hal ini sduah tercapai di tahun 2012 ini). Fakta lain, pencarian secara mobile meningkat sebanyak 4 kali dibandingkan tahun 2010. Pada tahun 2015 nanti, setiap orang di bumi akan memiliki paling tidak satu ponsel. Dengan fakta-fakta tersebut merupakan alasan betapa pentingnya bagi mereka yang memiliki blog atau situs agar membuat blog mereka mobile friendly.
Pertanyaannya bagaimana membuat blog mobile friendly?
Google memberikan tuntunan yang sangat bagus untuk membangun sebuah blog atau situs untuk keperluan bisnis menjadi blog atau situs mobile friendly. Tuntunan tersebut tidak sulit untuk diikuti, yaitu sebagai berikut.
1. Situs atau blog yang cepat. Cepat dalam artian bahwa waktu loading-nya sangat rendah, jika bisa di bawah lima detik karena setelah lima detik biasanya pengguna mobile tidak mau lebih lama menunggu. Mengapa demikian? Karena terkait dengan biaya internet. Biasanya pengguna memiliki kuota tertentu sehingga kala lama di suatu situs akan mengurangi kuota tersebut, sementara hasil yang diperoleh tidak ada.
Untuk mempercepat loading tampilkan yang perlu-perlu saja. Gambar besar dan teks yang besar harus dihindari agar blog terlihat minimalis.
2. Navigasi Mudah. Usahakan perpindahan dari satu sisi ke sisi lain sangat mudah digunakan. Navigasi yang mudah akan membuat pengunjung blog betah dan berlama-lama di blog mobile.
3. Be Thumb Friendly. Kebanyakan smartphone dan tablet berbasis touch screen. Usahakan apa yang akan diketuk oleh pengunjung di layar mudah ditemukan dan meminimalisasi kesalahan.
Tentu pertanyaannya adalah bagaimana membuat blog atau situs mobile sebagus yang ada di desktop. Untuk hal ini, Google bekerja sama dengan DudaMobile memberikan paket blog mobile secara gratis satu tahun senilai 108 dollar AS. Ini artinya di tahun kedua nanti anda harus bayar.
Ikuti langkah demi langkah berikut ini.
1. Masukkan URL Blog anda di Link ini seperti yang ditampilkan pada gambar berikut.
 Langkah Pertama, mendaftarkan URL blog
2. Setelah mendaftarkan URL, anda bisa memilih layout blog mobile yang anda inginkan, seperti gambar berikut ini. Jika suka salah satu layout kemudian klik Apply.
 Langkah kedua, pilih layout yang anda sukai
3. Langkah berikutnya memilih-milih desain blog mobile anda. Ada tersedia berbagai macam warna untuk home page, main page dan lainnya. Perhatikan gambar berikut ini.
 Langkah ketiga memilih desain dan warna
 Jika anda ingin menggunakan gambar sendiri juga bisa
 Anda bisa melakukan kustomisasi tampilan blog
 Kustomisasi juga bisa dilakukan terhadap header, home page, blog post, dan komentar
4. Setelah menemukan desain dan warna blog mobile yang anda sukai, anda bisa melihat preview blog anda di perangkat smartphone berbasis Android, iOS iPhone, BlackBerry dan Windows Phone. Perhatikan gambar berikut ini.
 Langkah keempat melihat preview tampilan blog di berbagai perangkat smartphone
 Tampilan blog jika dikunjungi dengan iPhone
5. Langkah berikutnya adalah mendaftarkan blog mobile yang baru saja anda buat ke DudaMobile. Form pengisian dapat dilihat sebagai berikut.
 Langkah kelima mendaftarkan blog mobile
6. Langkah keenam adalah menempatkan script HTML di blog versi desktop anda di head. Guna script HTML ini adalah untuk merefer blog anda ke versi mobile jika pengguna mengakses blog anda tersebut via perangkat bergerak. Perhatikan gambar berikut ini.

Setelah menempatkan script HTML tersebut, tugas anda membuat blog yang mobile friendly sudah selesai. Anda bisa menguji apakah langkah yang anda lakukan benar atau salah dengan mengunjungi blog anda secara mobile dengan smartphone. Selamat mencoba, Go Mobile!
]]>
Akun Paypal yang baru saja kita buat belum bisa digunakan untuk penarikan ke rekening bank kita, karena belum terverifikasi (unverified). Selain itu, akun yang belum verified belum bisa digunakan untuk berbelanja di toko-toko online.
Cara Verifikasi Paypal
Ada dua cara verifikasi Paypal, sebagai berikut :
1. Menggunakan Kartu Kredit
Paypal dapat diverifikasi dengan memasukkan angka yang ada di kartu kredit. Hal ini tidak masalah bagi Anda yang sudah memiliki kartu kredit. Namun bagi Anda yang belum punya, yang kita perlukan adalah membuat kartu kredit terlebih dahulu, baru kemudian bisa digunakan untuk verifikasi.
2. Menggunakan Virtual Credit Card (VCC)
VCC adalah sebuah kartu virtual yang di dalamnya terdapat beberapa digit angka yang berfungsi untuk memverifikasi Paypal. Status Paypal Anda yang belum terverifikasi ini menyebabkan penggunaan account Paypal Anda sangat terbatas, diantaranya: limit saldo yang diperbolehkan dalam account Paypal Anda tidak boleh lebih dari $100. Anda juga tidak bisa melakukan transaksi di beberapa merchant yang sistem pembayarannya bersifat langganan, dll.
VCC bisa kita dapatkan di penjual VCC yang terpercaya. Di vccmurah.com, selain telah terkenal sebagai situs VCC yang terpercaya, juga dijual dengan harga yang relative murah.
Jika Anda sudah memiliki kartu kredit atau VCC, berikut adalah langkah-langkah cara verifikasi Paypal :
- Login di Paypal Anda, kalo yang belum punya silahkan daftar dulu. (Baca artikel cara daftar Paypal)
- Klik “add a credit card” atau “link and confirm my debit or credit card”
- Silahkan masukan data-data kartu kredit atau VCC anda
- Klik “save and continue”
- Masuk kembali ke account Paypal anda, kemudian klik “unverified”
- Selanjutnya, bagi Anda yang menggunakan VCC langsung minta aja ke penjual VCC-nya 4 digit no. kode Paypal. Bagi Anda yang menggunakan kartu kredit, anda bisa mendapatkan kode Paypal di tagihan kartu kredit Anda (kurang lebih 5 hari untuk mendapatkannya setelah anda memasukan data kartu kredit di Paypal).
- Tekan “submit” dan selesai.
Jika semua data Anda isi dengan benar, Anda nanti akan mendapatkan sambutan “Your member status is: Verified”. Artinya account Paypal sudah berubah status dari unverified ke verified.
]]>- Pertama login ke blogger terlebih dahulu
- Klik Tata Letak
- Klik tab Elemen Halaman
- Klik Tambah Gadget
- Pilih Tambah HTML/JavaScriptCopy pastekan code translate di bawah kedalam kolom yang tersedia.
Tampilan Ke-1
<style>
.google_translate img {
filter:alpha(opacity=100);
-moz-opacity: 1.0;
opacity: 1.0;
border:0;
}
.google_translate:hover img {
filter:alpha(opacity=30);
-moz-opacity: 0.30;
opacity: 0.30;
border:0;
}
.google_translatextra:hover img {
filter:alpha(opacity=0.30);
-moz-opacity: 0.30;
opacity: 0.30;
border:0;
}
</style>
<div>

<a class="google_translate" href="#" target="_blank" rel="nofollow" title="English" onclick="window.open('http://translate.google.com/translate?u='+encodeURIComponent(location.href)+'&langpair=id%7Cen&hl=en'); return false;"><img alt="English" border="0" align="absbottom" title="English" height="32" src="http://lh6.ggpht.com/_pt7i0nbIOCY/SWwjycGEnLI/AAAAAAAAA1o/7p6S3-tipsA/English_thumb%5B3%5D.png?imgmax=800" style="cursor: pointer;margin-right:10px" width="24"/></a>

<a class="google_translate" href="#" target="_blank" rel="nofollow" title="French" onclick="window.open('http://translate.google.com/translate?u='+encodeURIComponent(location.href)+'&langpair=id%7Cfr&hl=en'); return false;"><img alt="French" border="0" align="absbottom" title="French" height="32" src="http://lh3.ggpht.com/_pt7i0nbIOCY/SWwj1AdOWZI/AAAAAAAAA1w/lWUkGNrOFYo/French_thumb%5B5%5D.png?imgmax=800" style="cursor: pointer;margin-right:10px" width="24"/></a>

<a class="google_translate" href="#" target="_blank" rel="nofollow" title="German" onclick="window.open('http://translate.google.com/translate?u='+encodeURIComponent(location.href)+'&langpair=id%7Cde&hl=en'); return false;"><img alt="German" border="0" align="absbottom" title="German" height="32" src="http://lh5.ggpht.com/_pt7i0nbIOCY/SWwj4Ab0NaI/AAAAAAAAA14/3H56LPKtijA/German_thumb%5B1%5D.png?imgmax=800" style="cursor: pointer;margin-right:10px" width="24"/></a>

<a class="google_translate" href="#" target="_blank" rel="nofollow" title="Spain" onclick="window.open('http://translate.google.com/translate?u='+encodeURIComponent(location.href)+'&langpair=id%7Ces&hl=en'); return false;"><img alt="Spain" border="0" align="absbottom" title="Spain" height="32" src="http://lh3.ggpht.com/_pt7i0nbIOCY/SWwj8KhadjI/AAAAAAAAA2A/GNyl8VBie3o/Spain_thumb%5B1%5D.png?imgmax=800" style="cursor: pointer;margin-right:10px" width="24"/></a>

<a class="google_translate" href="#" target="_blank" rel="nofollow" title="Italian" onclick="window.open('http://translate.google.com/translate?u='+encodeURIComponent(location.href)+'&langpair=id%7Cit&hl=en'); return false;"><img alt="Italian" border="0" align="absbottom" title="Italian" height="32" src="http://lh3.ggpht.com/_pt7i0nbIOCY/SWwj-14HeyI/AAAAAAAAA2I/TN52dIqkO9Q/Italian_thumb%5B1%5D.png?imgmax=800" style="cursor: pointer;margin-right:10px" width="24"/></a>

<a class="google_translate" href="#" target="_blank" rel="nofollow" title="Dutch" onclick="window.open('http://translate.google.com/translate?u='+encodeURIComponent(location.href)+'&langpair=id%7Cnl&hl=en'); return false;"><img alt="Dutch" border="0" align="absbottom" title="Dutch" height="32" src="http://lh5.ggpht.com/_pt7i0nbIOCY/SWwkBmKewNI/AAAAAAAAA2Q/43NEAnyNo1I/Dutch_thumb%5B1%5D.png?imgmax=800" style="cursor: pointer;margin-right:10px" width="24"/></a>

<br /><br />
<a class="google_translate" href="#" target="_blank" rel="nofollow" title="Russian" onclick="window.open('http://translate.google.com/translate?u='+encodeURIComponent(location.href)+'&langpair=id%7Cru&hl=en'); return false;"><img alt="Russian" border="0" align="absbottom" title="Russian" height="32" src="http://lh4.ggpht.com/_pt7i0nbIOCY/SWwkESa-0pI/AAAAAAAAA2Y/i0X4cKgxq3g/Russian_thumb%5B1%5D.png?imgmax=800" style="cursor: pointer;margin-right:10px" width="24"/></a>

<a class="google_translate" href="#" target="_blank" rel="nofollow" title="Portuguese" onclick="window.open('http://translate.google.com/translate?u='+encodeURIComponent(location.href)+'&langpair=id%7Cpt&hl=en'); return false;"><img alt="Portuguese" border="0" align="absbottom" title="Portuguese" height="32" src="http://lh4.ggpht.com/_pt7i0nbIOCY/SWwkG0osjzI/AAAAAAAAA2g/_kM2A16R_Ho/Portuguese_thumb%5B1%5D.png?imgmax=800" style="cursor: pointer;margin-right:10px" width="24"/></a>

<a class="google_translate" href="#" target="_blank" rel="nofollow" title="Japanese" onclick="window.open('http://translate.google.com/translate?u='+encodeURIComponent(location.href)+'&langpair=id%7Cja&hl=en'); return false;"><img alt="Japanese" border="0" align="absbottom" title="Japanese" height="32" src="http://lh5.ggpht.com/_pt7i0nbIOCY/SWwkJ6RBJAI/AAAAAAAAA2o/lpsTh893J3k/Japanese_thumb%5B1%5D.png?imgmax=800" style="cursor: pointer;margin-right:10px" width="24"/></a>

<a class="google_translate" href="#" target="_blank" rel="nofollow" title="Korean" onclick="window.open('http://translate.google.com/translate?u='+encodeURIComponent(location.href)+'&langpair=id%7Cko&hl=en'); return false;"><img alt="Korean" border="0" align="absbottom" title="Korean" height="32" src="http://lh4.ggpht.com/_pt7i0nbIOCY/SWwkMouNMKI/AAAAAAAAA2w/L5l6J-Hh8XA/Korean_thumb%5B1%5D.png?imgmax=800" style="cursor: pointer;margin-right:10px" width="24"/></a>

<a class="google_translate" href="#" target="_blank" rel="nofollow" title="Arabic" onclick="window.open('http://translate.google.com/translate?u='+encodeURIComponent(location.href)+'&langpair=id%7Car&hl=en'); return false;"><img alt="Arabic" border="0" align="absbottom" title="Arabic" height="32" src="http://lh5.ggpht.com/_pt7i0nbIOCY/SWwkPdkvXBI/AAAAAAAAA24/A1LSG1lcuac/Arabic_thumb%5B1%5D.png?imgmax=800" style="cursor: pointer;margin-right:10px" width="24"/></a>

<a class="google_translate" href="#" target="_blank" rel="nofollow" title="Chinese Simplified" onclick="window.open('http://translate.google.com/translate?u='+encodeURIComponent(location.href)+'&langpair=id%7Czh-CN&hl=en'); return false;"><img alt="Chinese Simplified" border="0" align="absbottom" title="Chinese Simplified" height="32" src="http://lh6.ggpht.com/_pt7i0nbIOCY/SWwkSgrv4ZI/AAAAAAAAA3A/jQqZ1l6avts/Chinese-Simplified_thumb%5B1%5D.png?imgmax=800" style="cursor: pointer;margin-right:10px" width="24"/></a>

</div> <div style=font-size:10px;margin:8px 0px 3px 0px>
by : <a href=http://www.blogspottutorial.com/>BTF
</div>
<style>
.google_translate img {
filter:alpha(opacity=100);
-moz-opacity: 1.0;
opacity: 1.0;
border:0;
}
.google_translate:hover img {
filter:alpha(opacity=30);
-moz-opacity: 0.30;
opacity: 0.30;
border:0;
}
.google_translatextra:hover img {
filter:alpha(opacity=0.30);
-moz-opacity: 0.30;
opacity: 0.30;
border:0;
}
</style>
<div>
<a class="google_translate" href="#" target="_blank" rel="nofollow" title="English" onclick="window.open('http://translate.google.com/translate?u='+encodeURIComponent(location.href)+'&langpair=id%7Cen&hl=en'); return false;"><img alt="English" border="0" align="absbottom" title="English" height="32" src="http://lh6.ggpht.com/_pt7i0nbIOCY/SWwjycGEnLI/AAAAAAAAA1o/7p6S3-tipsA/English_thumb%5B3%5D.png?imgmax=800" style="cursor: pointer;margin-right:10px" width="24"/></a>

<a class="google_translate" href="#" target="_blank" rel="nofollow" title="French" onclick="window.open('http://translate.google.com/translate?u='+encodeURIComponent(location.href)+'&langpair=id%7Cfr&hl=en'); return false;"><img alt="French" border="0" align="absbottom" title="French" height="32" src="http://lh3.ggpht.com/_pt7i0nbIOCY/SWwj1AdOWZI/AAAAAAAAA1w/lWUkGNrOFYo/French_thumb%5B5%5D.png?imgmax=800" style="cursor: pointer;margin-right:10px" width="24"/></a>

<a class="google_translate" href="#" target="_blank" rel="nofollow" title="German" onclick="window.open('http://translate.google.com/translate?u='+encodeURIComponent(location.href)+'&langpair=id%7Cde&hl=en'); return false;"><img alt="German" border="0" align="absbottom" title="German" height="32" src="http://lh5.ggpht.com/_pt7i0nbIOCY/SWwj4Ab0NaI/AAAAAAAAA14/3H56LPKtijA/German_thumb%5B1%5D.png?imgmax=800" style="cursor: pointer;margin-right:10px" width="24"/></a>

<a class="google_translate" href="#" target="_blank" rel="nofollow" title="Spain" onclick="window.open('http://translate.google.com/translate?u='+encodeURIComponent(location.href)+'&langpair=id%7Ces&hl=en'); return false;"><img alt="Spain" border="0" align="absbottom" title="Spain" height="32" src="http://lh3.ggpht.com/_pt7i0nbIOCY/SWwj8KhadjI/AAAAAAAAA2A/GNyl8VBie3o/Spain_thumb%5B1%5D.png?imgmax=800" style="cursor: pointer;margin-right:10px" width="24"/></a>

<a class="google_translate" href="#" target="_blank" rel="nofollow" title="Italian" onclick="window.open('http://translate.google.com/translate?u='+encodeURIComponent(location.href)+'&langpair=id%7Cit&hl=en'); return false;"><img alt="Italian" border="0" align="absbottom" title="Italian" height="32" src="http://lh3.ggpht.com/_pt7i0nbIOCY/SWwj-14HeyI/AAAAAAAAA2I/TN52dIqkO9Q/Italian_thumb%5B1%5D.png?imgmax=800" style="cursor: pointer;margin-right:10px" width="24"/></a>

<a class="google_translate" href="#" target="_blank" rel="nofollow" title="Dutch" onclick="window.open('http://translate.google.com/translate?u='+encodeURIComponent(location.href)+'&langpair=id%7Cnl&hl=en'); return false;"><img alt="Dutch" border="0" align="absbottom" title="Dutch" height="32" src="http://lh5.ggpht.com/_pt7i0nbIOCY/SWwkBmKewNI/AAAAAAAAA2Q/43NEAnyNo1I/Dutch_thumb%5B1%5D.png?imgmax=800" style="cursor: pointer;margin-right:10px" width="24"/></a>

<a class="google_translate" href="#" target="_blank" rel="nofollow" title="Russian" onclick="window.open('http://translate.google.com/translate?u='+encodeURIComponent(location.href)+'&langpair=id%7Cru&hl=en'); return false;"><img alt="Russian" border="0" align="absbottom" title="Russian" height="32" src="http://lh4.ggpht.com/_pt7i0nbIOCY/SWwkESa-0pI/AAAAAAAAA2Y/i0X4cKgxq3g/Russian_thumb%5B1%5D.png?imgmax=800" style="cursor: pointer;margin-right:10px" width="24"/></a>

<a class="google_translate" href="#" target="_blank" rel="nofollow" title="Portuguese" onclick="window.open('http://translate.google.com/translate?u='+encodeURIComponent(location.href)+'&langpair=id%7Cpt&hl=en'); return false;"><img alt="Portuguese" border="0" align="absbottom" title="Portuguese" height="32" src="http://lh4.ggpht.com/_pt7i0nbIOCY/SWwkG0osjzI/AAAAAAAAA2g/_kM2A16R_Ho/Portuguese_thumb%5B1%5D.png?imgmax=800" style="cursor: pointer;margin-right:10px" width="24"/></a>

<a class="google_translate" href="#" target="_blank" rel="nofollow" title="Japanese" onclick="window.open('http://translate.google.com/translate?u='+encodeURIComponent(location.href)+'&langpair=id%7Cja&hl=en'); return false;"><img alt="Japanese" border="0" align="absbottom" title="Japanese" height="32" src="http://lh5.ggpht.com/_pt7i0nbIOCY/SWwkJ6RBJAI/AAAAAAAAA2o/lpsTh893J3k/Japanese_thumb%5B1%5D.png?imgmax=800" style="cursor: pointer;margin-right:10px" width="24"/></a>

<a class="google_translate" href="#" target="_blank" rel="nofollow" title="Korean" onclick="window.open('http://translate.google.com/translate?u='+encodeURIComponent(location.href)+'&langpair=id%7Cko&hl=en'); return false;"><img alt="Korean" border="0" align="absbottom" title="Korean" height="32" src="http://lh4.ggpht.com/_pt7i0nbIOCY/SWwkMouNMKI/AAAAAAAAA2w/L5l6J-Hh8XA/Korean_thumb%5B1%5D.png?imgmax=800" style="cursor: pointer;margin-right:10px" width="24"/></a>

<a class="google_translate" href="#" target="_blank" rel="nofollow" title="Arabic" onclick="window.open('http://translate.google.com/translate?u='+encodeURIComponent(location.href)+'&langpair=id%7Car&hl=en'); return false;"><img alt="Arabic" border="0" align="absbottom" title="Arabic" height="32" src="http://lh5.ggpht.com/_pt7i0nbIOCY/SWwkPdkvXBI/AAAAAAAAA24/A1LSG1lcuac/Arabic_thumb%5B1%5D.png?imgmax=800" style="cursor: pointer;margin-right:10px" width="24"/></a>

<a class="google_translate" href="#" target="_blank" rel="nofollow" title="Chinese Simplified" onclick="window.open('http://translate.google.com/translate?u='+encodeURIComponent(location.href)+'&langpair=id%7Czh-CN&hl=en'); return false;"><img alt="Chinese Simplified" border="0" align="absbottom" title="Chinese Simplified" height="32" src="http://lh6.ggpht.com/_pt7i0nbIOCY/SWwkSgrv4ZI/AAAAAAAAA3A/jQqZ1l6avts/Chinese-Simplified_thumb%5B1%5D.png?imgmax=800" style="cursor: pointer;margin-right:10px" width="24"/></a>
</div> <div style=âfont-size:10px;margin:8px 0px 3px 0pxâ>
by : <a href=http://www.blogspottutorial.com/>BTF
</div>
Jenis Akun Paypal
Sebelum mendaftar PayPal, sebaiknya anda mengetahui jenis akun Paypal mana yang ingin Anda gunakan. Saya akan menjabarkan perbedaan dari ketiga jenis akun Paypal tersebut.
Jenis Akun Paypal
Paypal memiliki 3 jenis akun yaitu Personal, Premier dan Business. Apa perbedaan ketiga akun paypal tersebut? Berikut ini adalah perbedaan di antara ketiga nya :
- Paypal Personal Account
Akun ini dapat digunakan untuk berbelanja online, atau juga bisa digunakan untuk merima pembayaran dari akun Paypal lain. Kekurangan dari jenis akun ini adalah Anda tidak bisa menerima pembayaran dari credit, debit card, atau rekening bank. Akun personal ini juga membatasi jumlah pembayaran yang bisa Anda terima per bulannya. Jika Anda berencana ingin berjualan produk dalam jumlah banyak, tipe personal kurang cocok untuk Anda, Anda bisa menggunakan akun tipe lain seperti akun premier atau business.
- PayPal Premier Account
Premier account cocok untuk Anda yang memiliki volume transaksi tinggi dan jika Anda ingin menerima pembayaran dari credit card, debit card & rekening bank. Anda juga dapat menggunakan fasilitas shopping cart &
tool laporan pembayaran. Premier Account sangat cocok digunakan untuk pemula yang ingin menjual produknya secara reguler.
- Paypal Business Account
Business Account cocok untuk Anda yang berbisnis di bawah nama perusahaan atau kelompok. Jenis akun ini menerima semua jenis pembayaran dan dapat menerima pembayaran dari pelanggan tanpa account PayPal. Sama seperti jenis account premier, jenis akun ini da[at menerima pembayaran dari credit card, debit card dan rekening bank. PayPal akan mengenakan biaya kepada Anda sebagai penjual (penerima uang) sebesar 1.9% – 2.9% dari jumlah pembayaran yang diterima.
Jika Anda sudah mengetahui jenis akun Paypal mana yang ingin Anda gunakan, Anda bisa langsung mengunjungi website Paypal (www.paypal.com) dan ikuti langkah-langkah untuk mendaftar Paypal di sini.
]]>
Pembahasan wordpress lagi. Sudah lama saya tidak membahas masalah wordpress. Nah, kini saya akan mencoba membuka kembali berbagai Tutorial Blog seputar masalah WordPress. Kali ini pembahasan jatuh pada salah satu plugin yang hampir semua pengguna wordpress pasti menggunakannya. Ya, STT 2. Plugins STT 2 sendiri berfungsi untuk merekam setiap keyword yang masuk yang banyak di gunakan oleh orang untuk masuk ke dalam blog kita. Dan keyword tersebut nantinya akan di tampilkan di bagian bawah artikel kita maupun pada sidebar. jadi keyword ini bisa di gunakan untuk menambah keyword secara otomatis. Menarik bukan?
Untuk menginstallnya, lakukan langkah di bawah ini:
Menginstall Plugin STT2
1. Buka link http://www.domainanda.com/wp-admin/plugin-install.php untuk menuju halaman plugin pada dasbor wordpress anda.
2. Ketikkan keyword “Search Terms Tagging 2″. Kemudian klik “Search plugins”.
3. Maka akan muncul hasil pencarian plugin seperti di bawah ini. Klik saja install dan ikuti petunjuk selanjutnya.
4. Pada beberapa kejadian, plugin akan langsung terinstall. Namun pada beberapa hosting gratisan anda akan diminta mengisi form connection information. isi saja dengan panduan di bawah:
Hostname : LocalhostUsername : [username cpanel anda]Password : [password cpanel anda]Connection Type : Pilih “FTP” [default]Lalu tekan tombol “Proceed” (lingkaran merah)
5. Setelah terinstal aktifkan plugin STT2 tersebut dengan mengklik Activate Plugin.
Setting / Mengatur Plugin STT2 Pada WordPress
Sebenarnya setiap blogger pasti memiliki pengaturan tersendiri untuk plugin ini. Namun jika anda masih bingung dalam Setting / Mengatur Plugin STT2 Pada WordPress, maka saya akan share bagaimana saya men-Setting / Mengatur Plugin STT2 Pada WordPress saya.
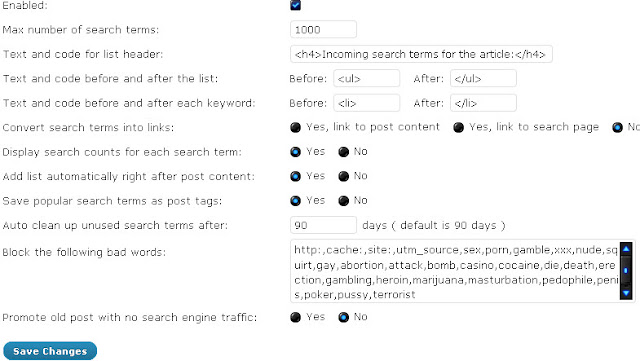
1. langsung menuju ke halaman SEO Search Terms Pada bagian sidebar kiri dasbor wordpress anda. akan terlihat halaman seperti di bawah ini.
Keterangan:
- Max number of search terms = Maksimal jumlah keyword yang akan ditampilkan.
- Text and code for list header = Teks yang akan di tampilkan sebagai kata pembuka.
- Text and code before and after the list = Kode HTML untuk memilih apakah keyword akan tersusun dari atas ke bawah (default) ataupun horisontal seperti paragraf .
- Text and code before and after each keyword = Kata atau kode sebelum dan sesudah masing-masing keyword
- Convert search terms into links = Opsi apakah anda akan menampilkan anchor text (link pada text) ke artikel, ke search page atau tidak sama sekali.
- Display search counts for each search term = Menampilkan jumlah pencarian pada masing-masing keyword
- Add list automatically right after post content = Menampilkan daftar keyword secara otomatis di bawah artikel
- Save popular search terms as post tags = Opsi apakah anda akan menjadikan Keyword pencarian terpopuler sebagai Tags Postingan
- Auto clean up unused search terms after = Membersihkan secara otomatis hasil search terms yang tidak digunakan
- Block the following bad words = Memblock semua kata yang anda masukkan sebagai search terms
Langsung saja setting/atur seperti gambar di bawah ini:
Nah, selamat mencoba…
One of the most important part of our blogs is the comment section.Especially if you own a huge blog with many visitors and commenters, the comment section design,the easy usage,the features,even the security is very important.I know there are some famous plugins which we use but i made a collection of some different plugins which maybe not known or less known.Here are the 40 plugins for comment section.I redirect the plugins to the original homepages so if you have problems you can ask the the author.The collection is made due to the average ratings of the users.
WP Grins Lite will provide clickable smilies for both the post form in the admin interface and the comments form of your blog. WP Grins Lite uses the lighter footprint of the jQuery library.

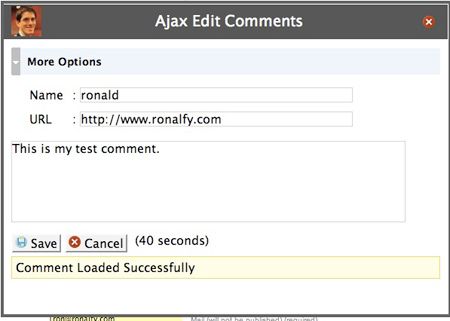
The most powerful comment editing solution for WordPress. Users can edit their own comments for a limited time, while admins can edit all comments.
- Can edit, de-link, move, mark for moderation, mark as spam, and delete a comment from a post.
- Can edit in all comment panels in the WordPress admin panel.
- Can de-spam, approve, moderate, and edit comments in the Akismet panel.
- Various admin-panel options including
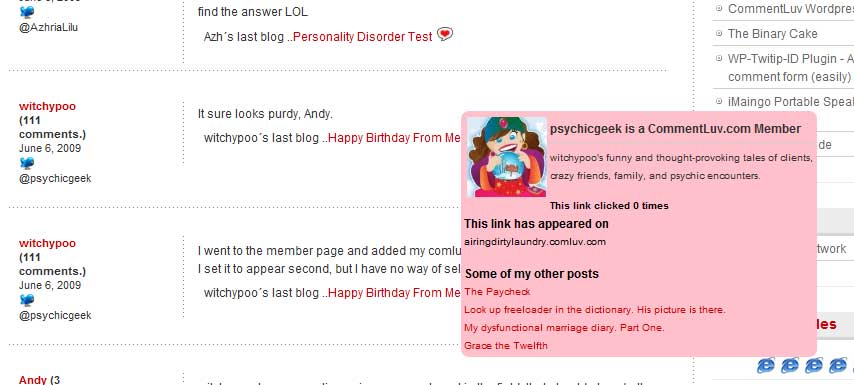
This plugin will visit the site of the comment author while they type their comment and retrieve a selection of their last blog posts, tweets or digg submissions which they can choose one from to include at the bottom of their comment when they click submit.
It has been found to increase comments and the community spirit for the thousands of blogs that have installed it. With a simple install you will immediately start to find new and interesting blog posts, tweets and diggs from your own blog and community.
Kaskus Emoticons is emoticons used in kaskus forum. Kaskus it self is the largest Indonesian community that has millions members and posts. Some images here are copyrighted by Kaskus.
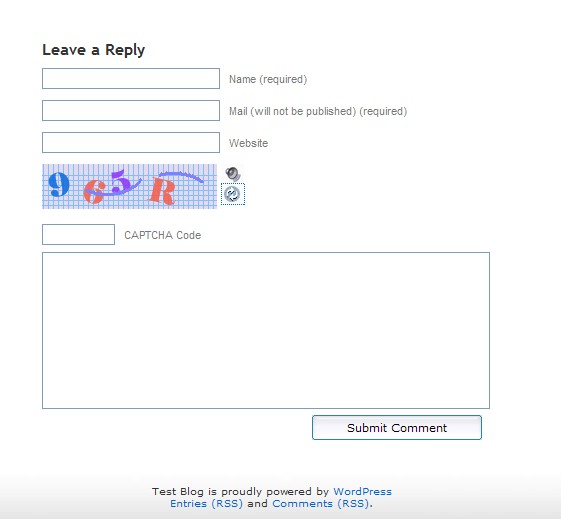
Adds CAPTCHA anti-spam methods to WordPress on the comment form, registration form, login, or all. In order to post comments or register, users will have to type in the phrase shown on the image. This prevents spam from automated bots. Adds security. Works great with Akismet. Also is fully WPMU and BuddyPress compatible.
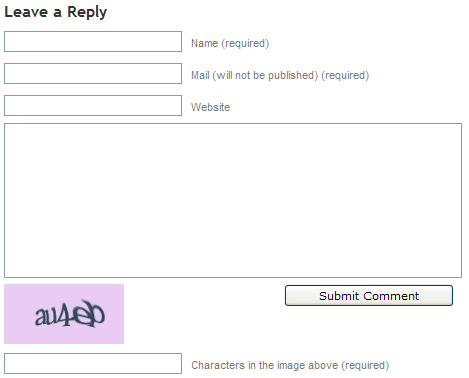
This plugin protects registration, login and comment forms from spambots by adding two extra fields hidden by CSS.
yaCAPTCHA is a CAPTCHA plugin for WordPress that helps you block comment spam from automated bots. In order to post comments, users will have to write down the characters that are part of an image. Since it is relatively hard for automated programs to figure out those characters, this will help prevent comment spam from those programs.
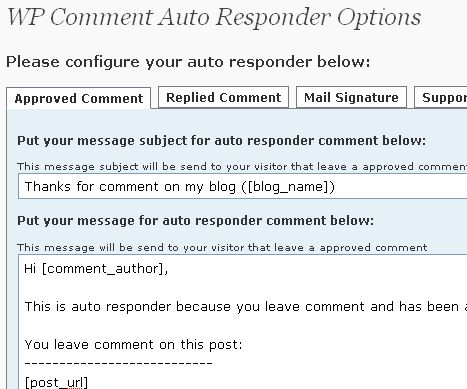
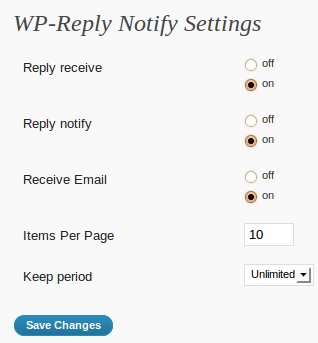
This plugin will send a automatic mail message when you visitor leave a comment on your wordpress blog.
Other feature of this plugin is when you or other visitor reply your visitor comment from your dashboard this plugin will make automatic message, and will tell to your visitor that their comment has replied.
9.GeoSmart
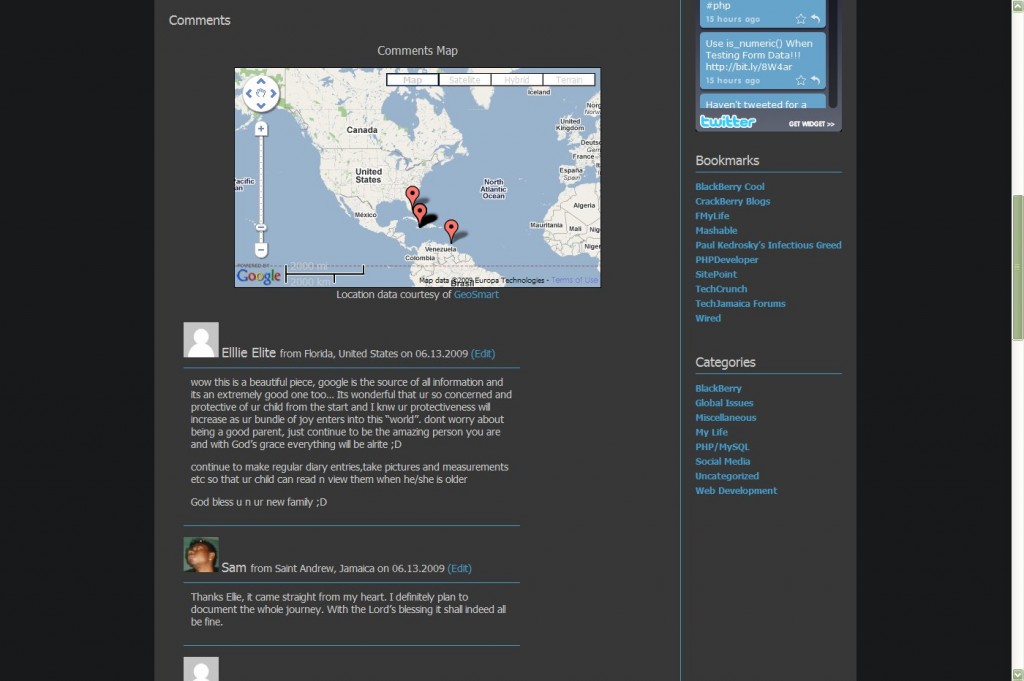
GeoSmart automatically adds city-precise location information for each comment author to comment metadata for each comment and a map showing comment author location distribution. GeoSmart also ships with a multiple instance capable sidebar widget that displays a map showing the locations of the most recent visitors to your blog.To display these maps you will need to obtain a Google Maps API Key
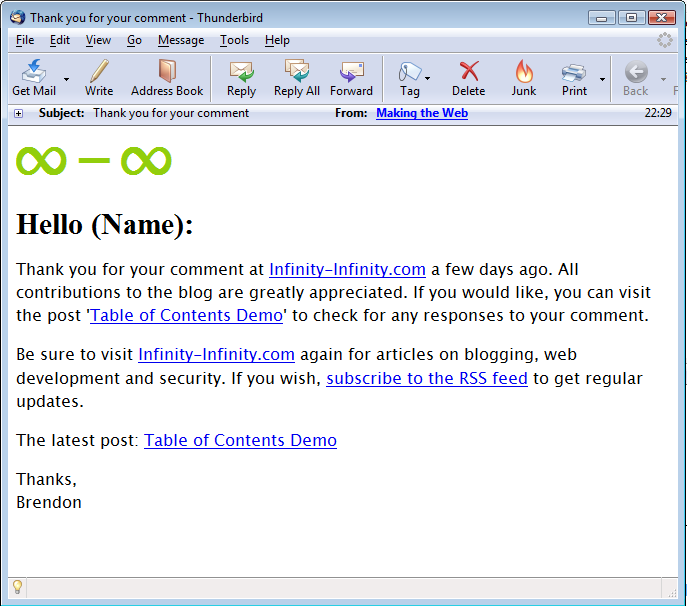
Thank Me Later (TML) will automatically send an e-mail to your those who leave a comment at your blog. Use this plugin to say ‘Thanks’ to your visitors, and prompt them to further engage with your blog.
TML is highly configurable. It allows you to create multiple e-mail messages and to send the message after a pre-defined amount of time, making messages appear more unique and people-friendly.
11.Kau-Boy’s Comment Notification
This plugin enables blog admins and editors to manage the notification of incomming comments. As WordPress only has the option to notify on every comment, the email account of the admin may recieve many email each day. Notification is also limited to the admin only, so only the admin user will recieve an email for incomming comments.
Using the plugin you can subscribe to a RSS feed that contains even comments that has to be moderated.
Disqus, pronounced “discuss”, is a service and tool for web comments and discussions. The Disqus comment system can be plugged into any website, blog, or application. Disqus makes commenting easier and more interactive, while connecting websites and commenters across a thriving discussion community.

Commentwitter is a WordPress plugin that gives commenters the option of Tweeting their comment with a link to your post.
Other features
- Automatically creates bit.ly to specific comments in a post
- Integrates nicely into forms
- Blog owner can Tweet new comments automatically on their profile

This plugin adds a tiny link that says “Quote” on each comment on your posts. Click it, and the contents of the comment is copied to the comment area, wrapped in blockquote tags.
15.Vertical Scroll Recent Comments
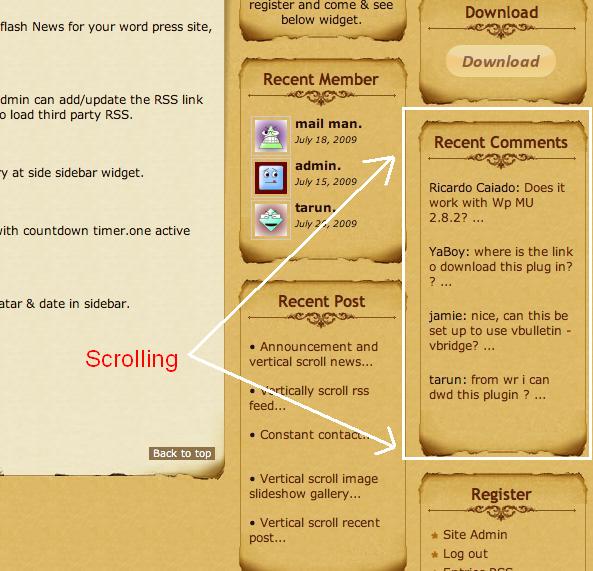
This will vertically scroll the recent comments in site side bar or any desired location with avatar or name or none.
Feature
- It’s scrolling vertical so we can display more comments
- User can see the newest comments at sidebar.
- You can customize the number of recent comments to display.
- It’s scrolling so it occupies less space in sidebar.
16.Advanced User Agent Displayer
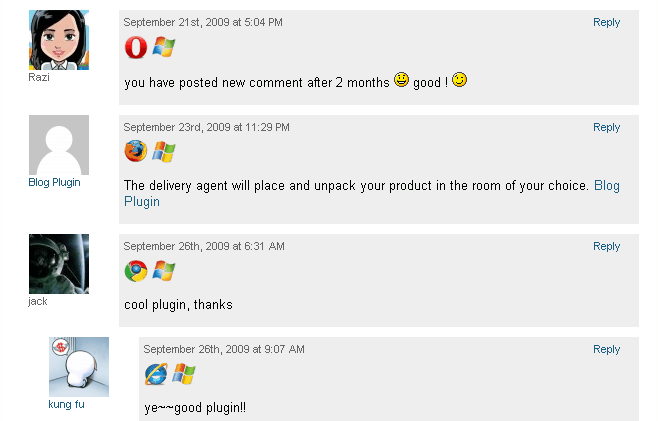
the Advanced User Agent Displayer plugin displays the Browser and the operating system of people who commnet on your blog. Currently Support for Desktop and moblie operationg systems and browsers. Browsers: Internet Explorer, Opera, Firefox, Safari, Chrome, Epiphany, Avant, Maxthon, Konqueror and … Platform: Windows(2000, XP, Vista, 7), Linux, Mac, iPhone.
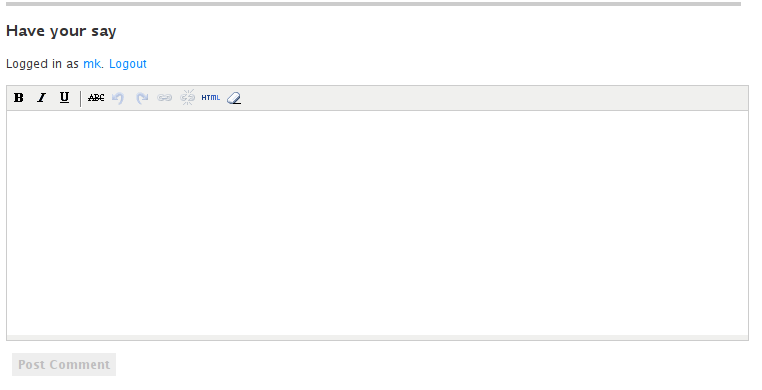
This plugin turns the comment field from a primitive <textfield> into a WYSIWYG editor, using the internal TinyMCE library.
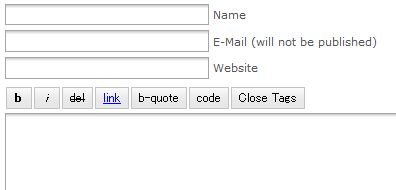
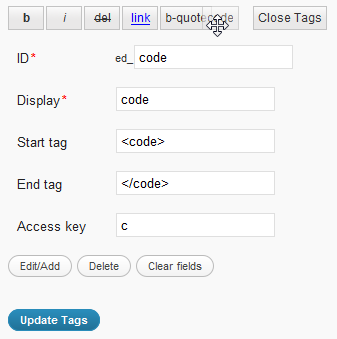
This plugin inserts quicktags of the admin page to the upper part of textarea of the comment form.
Features
- You can edit tags in the admin page.
- You can limit quicktags by user roles.
19.replyMail
WordPress version MUST up to 2.7+
Enhance the threaded comments system of WordPress 2.7+. When someone reply to your comment, send a email to you.
20.@ Reply
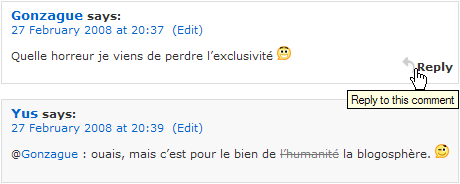
This plugin allows you to add Twitter-like @reply links to comments. When clicked, those links insert the author name and a link to the comment you are replying to in the textarea.
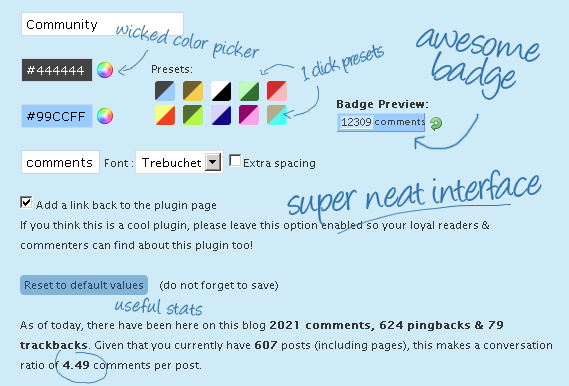
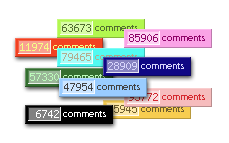
Liz Strauss Comment Counter is a highly configurable badge (very similar to the Feedburner one, except it’s more configurable) to show off the number of comments your blog has.
22.Digress.it
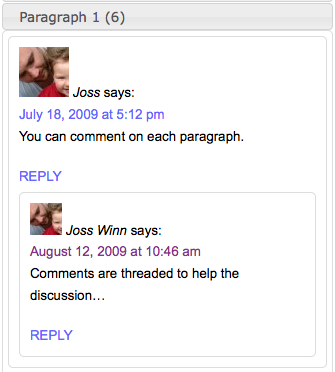
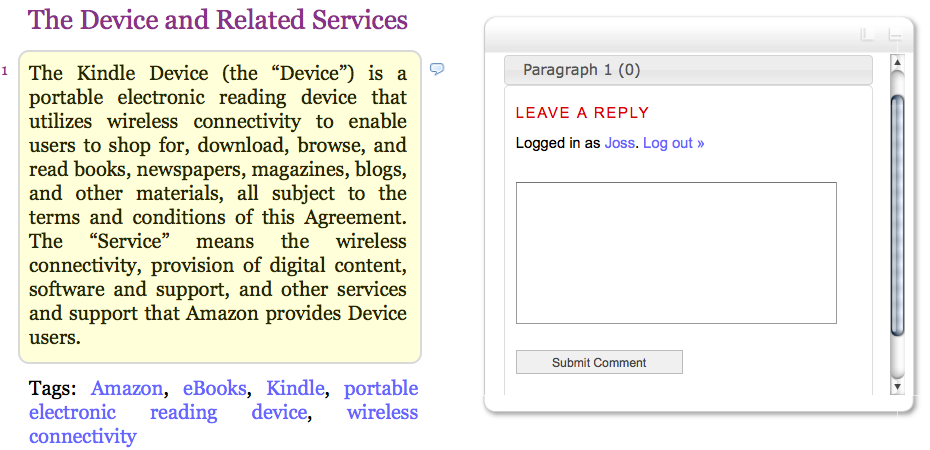
Digress.it lets you comment paragraph by paragraph in the margins of a text.Embed paragaphs YouTube-style on other sites.
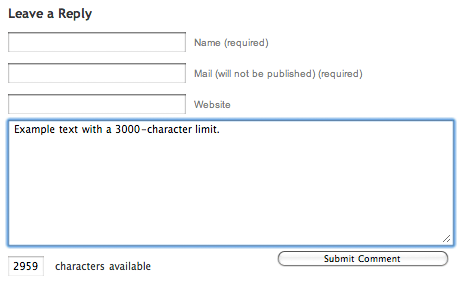
23.Greg’s Comment Length Limiter
This plugin provides a configurable limit on the length of comments left in the comment form, with a character countdown displayed for the user and dynamically updated with each keypress.
This plugin will integrate AJAX commenting feature into your WordPress Blog. It uses the powerful JavaScript Framework jQuery to handle AJAX requests and jQuery Validation plugin by bassitance.de to validate comment form on the client side.
Feature Summary
- Enable AJAX Commenting
- Client Side Form Validation
- Easily rolls back if JS disabled
- Easily configure custom styles for messages
25.AVrAmTAR
AVrAmTAR.com is service which allows user to register and upload multiple avatars in their account. After that user will get his unique URL to the dynamic GIF image which will show different avatar (chosen from avatars user have uploaded) each time URL is accessed.
![]()
Allows you to uniquely style post author’s comments.
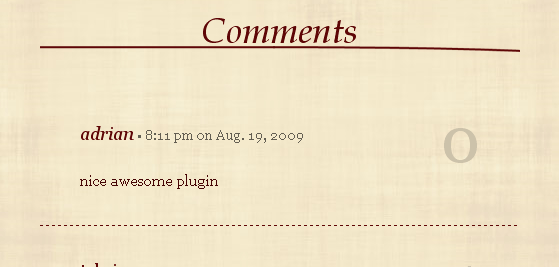
This plugin allows to display or retrieve comments posted by a user. In order to avoid homonyms, a user is identified by his name and email(s).
This plugin adds a stylesheet to your blog’s html source code. When a browser loads that stylesheet a cookie is dropped. If that user then leaves a comment the cookie is checked. If it doesn’t exist the comment is marked as spam.Copy into your plugins folder and activate. If you are using a caching plugin such as WP Super Cache make sure you clear the cache after enabling this plugin.
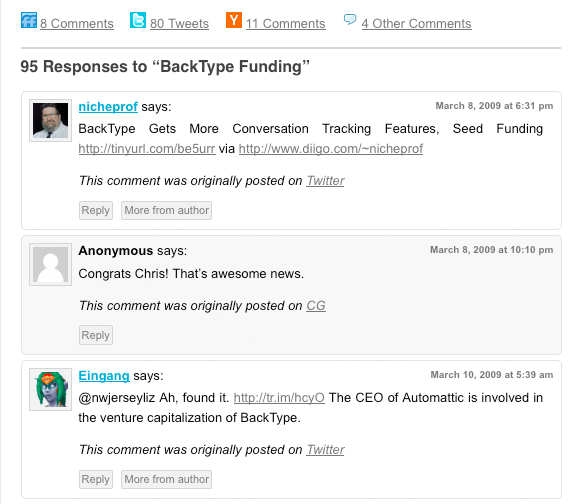
The BackType Connect WordPress plugin finds conversations related to your content and allows you to display the associated comments inline with your own. Existing conversations about your content taking place across the web can now be displayed right on your blog for your visitors to read and respond to. It works on top of your existing WordPress comments, both threaded and non-threaded.
- Twitter – tweets that link your posts
- FriendFeed – on the entries for your posts
- Digg – on the submissions for your posts
- Reddit – on the submissions for your posts
- Hacker News – on the submissions for your posts
- Other blogs – whenever someone links one of your posts
If you answer comments, you can get information through the blog address of comments. The other way, you can see information about comments other blogs send by admin e-mail.
31.GravatarGrid
Displays the Gravatars of all your commenters as a nice mosaic in the sidebar of your blog. The plugin is widget ready and comes with many configuration options!
Horizontal Position
![]()
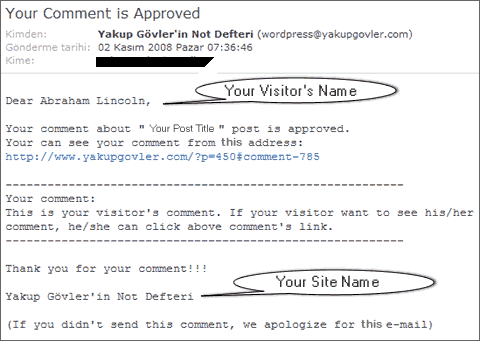
Comment Approved Notifier sends an e-mail to your commenters when you approve their comments. It is a very simple plugin. There are no settings, options. It starts to work when you activate it.
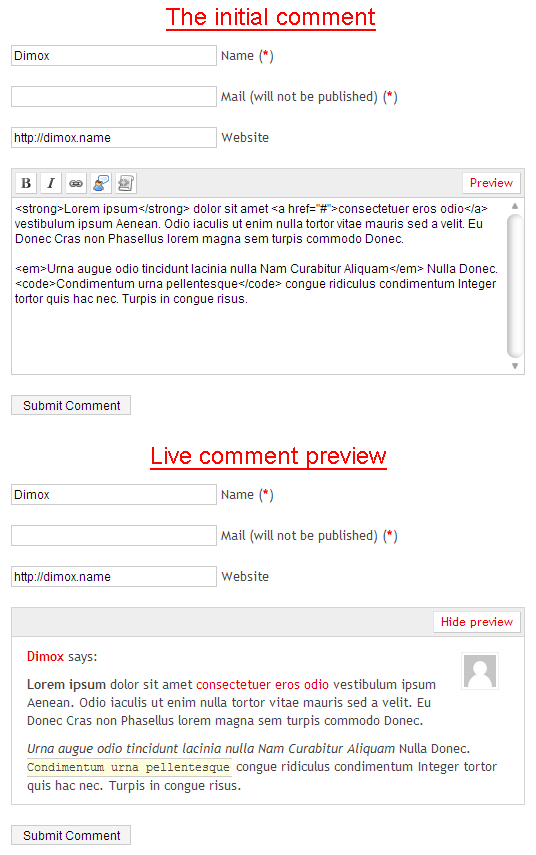
Live comment preview without page reboot. Works on jQuery.
Attention: knowledge of CSS and HTML may require for using a plugin.
Requires WordPress version: 2.5 or higher.
Delink Comment Author gives you the ability to remove the link a commenter left as their URL without removing the entire comment.
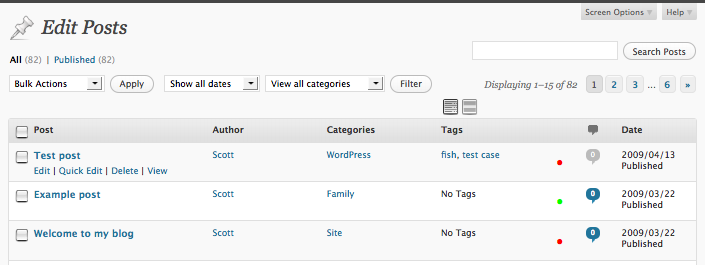
Conveniently close or open comments for a post or page with one click.
From the admin listing of posts (‘Edit Posts’) and pages (‘Edit Pages’), a user can close or open comments to any posts to which they have sufficient privileges to make such changes (essentially admins and post authors for their own posts). This is done via an AJAX-powered color-coded indicator. The color-coding gives instant feedback on the current status of the post for comments: green means the post/page is open to comments, red means the post/page is closed to comments. Being AJAX-powered means that the change is submitted in the background without requiring a page reload.
This plugin will only function for administrative users in the admin who have JavaScript enabled.
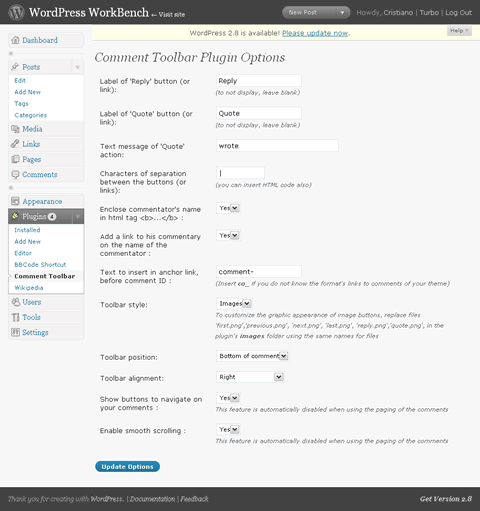
This plug-in adds up to six buttons at the end (or the top) of every comments to automatically insert Comments Navigation, Reply and Quote functions. Then you can respond to the author of each comment and quote some or all of its comment. In addition, you can move easily between comments with smooth scrolling. Now you can customize the graphic appearance of button images.
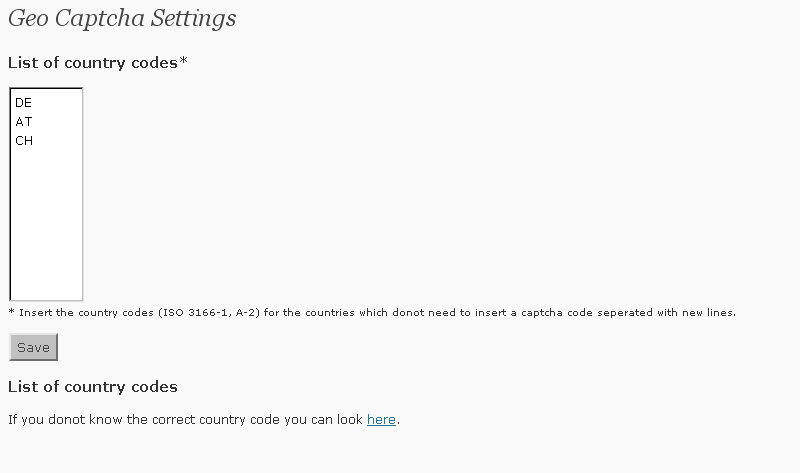
37.Geo Captcha
Most spam most comes from certain countries. An effectiv method to avoid spam is to add a captcha to your commentbox, but it annoies your human users.
Geo Captcha uses the GEO-IP-library GeoLite Country by MaxMind (http://www.maxmind.com/) to get to know from which country the commentator comes from. If this country is not registered in the whitelist (can be edited in the admin interface) the commentator needs to enter a captcha, which is generated by SecurImage (http://www.phpcaptcha.org/)
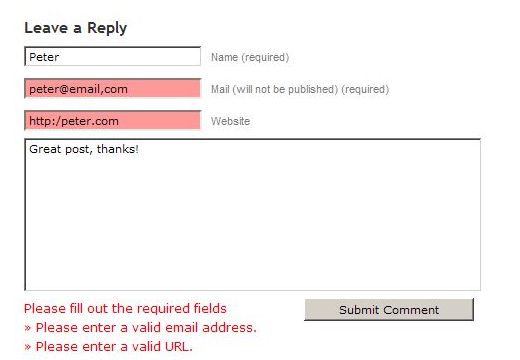
Did you ever see a message like ”please fill out required fields” or ”missing required fields”.This plugin aims to help by adding validation to the comment form. When a user submits the form and something is missing, an appropiate message is displayed and individual fields are highlighted. When the email or url is in an incorrect format, a message is displayed accordingly.
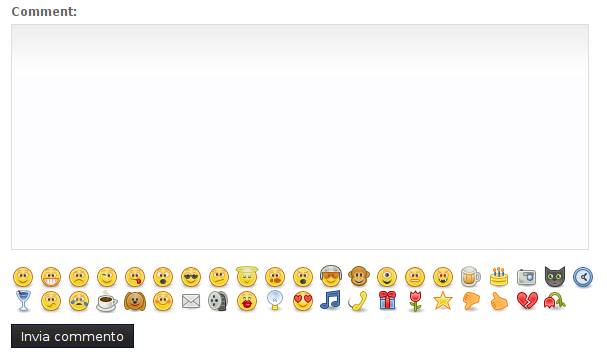
Smilies Themer Toolbar provides a toolbar to easily add custom smilies to comments.From v1.0, (WP>=2.5 only) it also integrates into tinyMCE, the rich text editor that you use when you write the posts.
It integrates with Smilies Themer plugin, and therefore requires it.
You can change your smilies theme in your blog, and the toolbar is automagically updated!
Some visitors only comment with just a smile and if this is annoying for you then you can use this plugin.Minimum Comment Lenght plugin as you understand from the name forces to comment for more than 15 characters.If people then leave a comment of less than 15 characters, WordPress dies on them with the message “Error: Your comment is too short. Please try to say something useful.”, or whatever other message you decided to give to them, as this is the second option you can specify in the backend.
]]>Memang jika blog kita memiliki banyak banner sehingga memberatkan blog kita terpaksa menghilangkan banner-banner itu. Tapi kini ada solusinya, yaitu dengan menggunakan random banner. Jadi kita hanya mengeluarkan misalnya 12 banner, tetapi itu akan tertampil pada blog hanya 6 banner dan sisanya akan di tampilkan secara random jika kita merefresh ulang.
Itu akan menghemat pemakaian banner secara berlebihan. Jadi kita dapat memasang banyak banner tanpa takut kecepatan akses internet jadi lambat. Disini kita akan mempelajari cara penggunaan Plugin “Random / Rotating Ads” sebagai random banner. Berikut cara-caranya :
-
Lalu buka file datafeedr-random-ads -> wp-content -> plugins.
-
Buatlah directory bernama “ads” ke wp-content atau bisa upload directory bernama “ads ” ke wp-content.
-
Upload file “datafeedr-ads.php ” ke wp-content/plugins.
-
Aktivkan plugin nya.
-
Sekarang buat file .txt :
-
-
Buka Notepad dan namakan misalnya “ad_125x125.txt” lalu isi code html banner dan pisahkan dengan tanda | (Shift+Marco), contoh:
<a href=”http://example.com” title=”example.com”>
<img src=”http://thedery.co.cc/wp-content/themes/statement/images/banner/125×125.jpg” border=”0″ alt=”” width=”125″ height=”125″ />
</a>
|
<a href=”http://example2.com” title=”example2.com”>
<img src=”http://thedery.co.cc/wp-content/themes/statement/images/banner/125×125.jpg” border=”0″ alt=”” width=”125″ height=”125″ />
</a>
-
Ini berarti dalam 1 tempat banner terdapat 2 banner yang tertuju ke example.com dan example2.com
-
lalu simpan “ad_125x125.txt” kedalam directory “ads” (wp-content/ads)
-
-
Mungkin di bagian ini sedikit membingungkan karena harus mengedit sebagian theme yang dipakai, tetapi ada juga cara yang lebih mudah, berikut 2 caranya, saya sarankan pakai cara ke 2 karena lebih mudah :
- Cara 1 :
- Copy code berikut dan pastekan pada bagian theme yang ingin ditampilkan seperti pada sidebar.php atau yang lain. Misalnya copy paste di bagian sidebar.php :
<?php if (function_exists(‘dfrad’)) { echo dfrad(‘ad_125x125‘); } ?>
Keterangan warna merah :
- ad_125x125 : Nama banner .txt yang tadi sudah di buat
- Buka wp-content/themes/(*theme yang anda pakai)/sidebar.php dan pastekan di bagian yang ingin di tampilkan.
- Itu baru 1 tempat banner yang terdapat 2 banner, anda bisa menambahkannya 1, 2, 3 hingga banyak tempat banner sekaligus dengan mendoublekan code di atas.
- Copy code berikut dan pastekan pada bagian theme yang ingin ditampilkan seperti pada sidebar.php atau yang lain. Misalnya copy paste di bagian sidebar.php :
- Cara 2 :
-
- Buka bagian Widget Blog.
- Lalu Add Random Ads nya.
- Klik Edit dan tulis nama file .txt nya. seperti contoh yang tadi “ad_125x125” tulis tanpa .txt
- Klik Done dan klik Save Changes.
- Cara 1 :
-
Setelah itu buka blog anda dan refreslah berulang ulang, banner akan di muncul secara random.
Jika masih belum mengerti pulang saja bisa lihat video dari sini.
 Tutorial kali ini mengenai bagaimana caranya memasukan gambar( image ) ke artikel anda, seperti yang anda lihat di kiri artikel saya ini. Sebelum saya menjelaskan bagaimana caranya memasukan gambar ke artikel, ada baiknya anda siapkan dulu gambarnya dan saya rekomendasikan gambar anda jangan lebih dari 200x200px apabila anda ingin memasang gambar tersebut di sebelah kiri atau kanan artikel.
Alasannya agar gambar dan tulisan anda akan terlihat seimbang dan rapi.Pilihlah gambar yang sesuai dengan artikel anda, tapi itu hanya optional saja karena tidak sedikit blogger juga menggunakan gambar-gambar yang tidak sesuai dengan artikel.Sekarang saya jelaskan step by step cara memasang gambar pada artikel :
1.Silahkan anda login ke wp-admin.
2.Lihat kiri anda, ada menu Posts klik pada tanda panah yang ada di sebelah kanan Posts agar memunculkan menu drop down.
3.Setelah itu anda klik Add New.
4.Setelah masuk ke halaman untuk membuat artikel anda cari kotak kecil tepat di sebelah tulisan Upload/Insert.Lihat gambar di bawah ini.

5.Klik pada kotak kecil tersebut.Lalu akan muncul gambar berikut.
 6.Klik pada Select Files.Kemudian anda tinggal pilih gambar yang akan di pasang pada artikel anda.


