
CDN Cloudface
Kecepatan halaman website atau blog adalah elemen penting dalam menentukan pagerank mesin pencari situs Web Anda. Belum lagi, situs yang lambat menyebabkan pengunjung malas. Jika anda ingin mmempunyai website wordpress yang cepat anda bisa menggunakan MaxCDN dan W3 Total cache, namun menggunakan MaxCDN itu berbayar, tapi Pada artikel ini, saya akan menunjukkan cara untuk mengatur CloudFlare CDN gratis di WordPress. Tapi jangan berharap kecepatan website anda menjadi lebih cepat diberbagai negara jika anda menggunakan layanan hosting yang jelek. Saya menyarankan anda untuk mencoba menggunakan hosting murah, cepat, unlimited di ipage.
CloudFlare pada dasarnya adalah sebuah Web Application Firewall, proxy server terdistribusi, dan jaringan pengiriman konten (CDN). Ini mengoptimalkan website Anda dengan bertindak sebagai proxy antara pengunjung dengan server Anda yang membantu meningkatkan keamanan dan melindungi situs Anda terhadap serangan DDoS.
Mereka menawarkan rencana dasar gratis yang cocok untuk website kecil dan blog. Mereka juga menawarkan rencana dibayar mulai dengan $20 per bulan.
Untuk setup CloudFlare, hal pertama yang perlu Anda lakukan adalah untuk mendaftar untuk sebuah account. Kunjungi situs CloudFlare dan klik pada link Signup dan isi email, username dan password anda seperti gambar dibawah ini dan klik create account.

Masukkan nama website nama website anda.

Configure your record, tunggu beberapa saat setelah selesai, lalu continue.

Setelah anda klik continue diatas maka berikutnya akan tampil configure DNS seperti dibawah ini
 Lakukan Settings choose a plan menjadi 0$ seperti dibawah ini.
 Dan yang terakhir akan muncul settings DNS seprti dibawah ini.
 Note : di bulatan merah diatas yang sebelah kiri current name server adalah name server anda yang asli, dan yang sebelah kanan adalah name server dari cloudflare, silahkan ganti name server anda dengan name server milik cloudflare.
There are hundreds of WordPress SEO plugins available in the WordPress.org plugins depository courtesy of numerous selfless and great WP developers who have invested their time, energy, resources and intellect into the development of these SEO plugins.
But, due to the volume of SEO plugins that are available, it is a bit difficult for bloggers, especially newbie bloggers, to know which and which SEO plugins is suitable for their blog.
To be Candid, not all WP SEO plugins are good, in fact, there are some that will break/mess up your blog and your search engine rankings if you ever try to use them. So, in other to prevent such occurrence and help you in selection of SEO plugins, I have decided to share with you some tested, trusted and effective WP SEO plugins that you can try out on your blog.
Without much ado, let us meet our Top 10 WordPress SEO plugins.
One of the most popular and most widely used WordPress SEO plugin is the All in one SEO Pack plugins. This plugin is well known for its simple interface and ease of use; AIO SEO is very compatible with almost every plugin and it is absolutely less buggy.
This plugin will handle the overall SEO of your blog ranging from: META Descriptions, Page Titles, META Keywords, Indexation and so on. This plugin is my favorite SEO plugin, I use it on all my major blogs; AIO SEO can also automatically generate META descriptions for your posts and optimize your titles for search engines.
This plugin also enables you to manually include META tags (title, description and keywords) for each Post/page on your blog. This is one plugin you must have on your blog.

Google XML sitemap is also another SEO plugin that is very very very important, this plugin will create a XML sitemap format for your blog, this sitemap will help Search engines to crawl your blog easily and index every content on your blog.
Do not be deceived by its name, Google XML Sitemap plugin is not just for Google, the XML sitemap created is supported by Google, BIng, Yahoo and Ask search engines. Google XML Sitemap plugin will also notify all major search engines very time you publish a new post or update your blog.
The settings is quite easy to configure, it is just a matter of ticking and un-ticking some boxes.

SEO Friendly Images is a SEO plugin that will help you to optimize your blog images for proper search engine rankings. If you don’t know, images on your blog can be a source of huge traffic for you blog and this plugin will help you to achieve this.
SEO friendly images plugin will automatically update all your blog images ALT and TITLE tags. The ALT tags acts as the image description while the TITLE is the text displayed when the mouse is hovered on the image. These two attribute are important part of you blog SEO that you must not ignore.
SEO Post Links plugin is a plugin that will help to shorten your blog post permalinks/URL. Usually when you create a new posts, the posts slug will be the whole of the post title which is bad for SEO, but when you have this plugin installed, it will automatically cut off unnecessary words and make your posts URL short and Search engine friendly.
I will recommend this plugin for all bloggers, especially newbie’s.

The All in One Webmaster plugin is a nifty plugin that is very useful for all bloggers; this plugin makes your blog verification across various major platforms a breeze.
With All in One Webmaster, it is very easy for you to verify your blog with Alexa, Google Webmasters, Google Analytics Click and lots more.
It also helps you to submit your sitemap to search engines.
Redirection is a plugin that helps you to manage 301 redirections, to keep track of dead links 404 error pages and also to correct them. It also allows you to monitor your redirects by giving you full logs of all redirected URLs and also RSS feed for 404 errors.
It also, automatically adds a redirection when a posts permalink/URL changes.

NoFollow Link plugin will let you set the nofollow attribute tag for links within your blog posts. This plugin will add a button to your post editor top pane which you can use to add “nofollow” attributes to any links within your posts; this plugin will come handy when you have a post that deals with external links like this one.
It is important for you to control your on page link juice flow, so make sure you use this plugin to your advantage. Just select a link in the post and click the No Follow button, and the nofollow attribute will be added to the link.
Automatic SEO links plugin is a plugin that help with automatic linking of words and phrases in your blog posts. This plugin is quite easy to use, just choose a word and a URL and this plugin will replace all matches in the posts of your blog.
Automatic SEO links also let to set the link Title, target, and rel. You can also choose whether the link should be “Nofollow” or “Dofollow”.

SEO Blog roll will be of help to bloggers that are making use of the WordPress blog Roll feature. This plugin will let you control which blogs on your blog roll that link juice are passed to. The plugin will let your add “nofollow” to any link on your blog roll.
This way, you can conserve your link juice and blog page rank.
We all should know by now that social media now has a part to play in our SEO campaigns this is why I will be adding this plugin to this list. The Digg Digg plugin lets you add all major Social Networks and Social Bookmarking sites sharing buttons to your blog.
A good demo of this plugin is the floating sharing buttons at the left-hand side of this blog. Search engines are now taking notice of social media trends in their search rankings, so make sure you add this plugin so that it is easy for your readers to share your posts.
]]>
Meningkatnya jumlah pengguna internet mobile membuat pasar baru yang penuh dengan peluang. Kini sebanyak enam miliar orang di dunia memiliki ponsel. Ponsel tersebut bisa basic, bisa juga smartphone. Di sisi smartphone kini makin banyak perangkat Android yang beredar setiap hari. Google sebagai pemilik Android mengklaim bahwa perangkat Android yang diaktifkan setiap hari di seluruh dunia mencapai 1,3 unit per hari. Perangkat tersebut sebagian besar adalah smartphone dan tablet yang mampu mengakses internet secara mobile.
Jumlah tersebut tentu belum ditambahkan dengan perangkat mobile yang dirilis oleh RIM BlackBerry, Apple, dan Nokia. Hal ini menjadikan internet mobile sebagai salah satu primadona pengguna smartphone dan tablet. Sebagian besar pengguna smartphone dan tablet pasti mengakses internet sehingga mereka perlu dilayani dengan sangat baik.
Google mengatakan bahwa pada tahun 2013 nanti orang yang menggunakan ponsel lebih banyak daripada pengguna komputer desktop (mungkin saja hal ini sduah tercapai di tahun 2012 ini). Fakta lain, pencarian secara mobile meningkat sebanyak 4 kali dibandingkan tahun 2010. Pada tahun 2015 nanti, setiap orang di bumi akan memiliki paling tidak satu ponsel. Dengan fakta-fakta tersebut merupakan alasan betapa pentingnya bagi mereka yang memiliki blog atau situs agar membuat blog mereka mobile friendly.
Pertanyaannya bagaimana membuat blog mobile friendly?
Google memberikan tuntunan yang sangat bagus untuk membangun sebuah blog atau situs untuk keperluan bisnis menjadi blog atau situs mobile friendly. Tuntunan tersebut tidak sulit untuk diikuti, yaitu sebagai berikut.
1. Situs atau blog yang cepat. Cepat dalam artian bahwa waktu loading-nya sangat rendah, jika bisa di bawah lima detik karena setelah lima detik biasanya pengguna mobile tidak mau lebih lama menunggu. Mengapa demikian? Karena terkait dengan biaya internet. Biasanya pengguna memiliki kuota tertentu sehingga kala lama di suatu situs akan mengurangi kuota tersebut, sementara hasil yang diperoleh tidak ada.
Untuk mempercepat loading tampilkan yang perlu-perlu saja. Gambar besar dan teks yang besar harus dihindari agar blog terlihat minimalis.
2. Navigasi Mudah. Usahakan perpindahan dari satu sisi ke sisi lain sangat mudah digunakan. Navigasi yang mudah akan membuat pengunjung blog betah dan berlama-lama di blog mobile.
3. Be Thumb Friendly. Kebanyakan smartphone dan tablet berbasis touch screen. Usahakan apa yang akan diketuk oleh pengunjung di layar mudah ditemukan dan meminimalisasi kesalahan.
Tentu pertanyaannya adalah bagaimana membuat blog atau situs mobile sebagus yang ada di desktop. Untuk hal ini, Google bekerja sama dengan DudaMobile memberikan paket blog mobile secara gratis satu tahun senilai 108 dollar AS. Ini artinya di tahun kedua nanti anda harus bayar.
Ikuti langkah demi langkah berikut ini.
1. Masukkan URL Blog anda di Link ini seperti yang ditampilkan pada gambar berikut.
 Langkah Pertama, mendaftarkan URL blog
2. Setelah mendaftarkan URL, anda bisa memilih layout blog mobile yang anda inginkan, seperti gambar berikut ini. Jika suka salah satu layout kemudian klik Apply.
 Langkah kedua, pilih layout yang anda sukai
3. Langkah berikutnya memilih-milih desain blog mobile anda. Ada tersedia berbagai macam warna untuk home page, main page dan lainnya. Perhatikan gambar berikut ini.
 Langkah ketiga memilih desain dan warna
 Jika anda ingin menggunakan gambar sendiri juga bisa
 Anda bisa melakukan kustomisasi tampilan blog
 Kustomisasi juga bisa dilakukan terhadap header, home page, blog post, dan komentar
4. Setelah menemukan desain dan warna blog mobile yang anda sukai, anda bisa melihat preview blog anda di perangkat smartphone berbasis Android, iOS iPhone, BlackBerry dan Windows Phone. Perhatikan gambar berikut ini.
 Langkah keempat melihat preview tampilan blog di berbagai perangkat smartphone
 Tampilan blog jika dikunjungi dengan iPhone
5. Langkah berikutnya adalah mendaftarkan blog mobile yang baru saja anda buat ke DudaMobile. Form pengisian dapat dilihat sebagai berikut.
 Langkah kelima mendaftarkan blog mobile
6. Langkah keenam adalah menempatkan script HTML di blog versi desktop anda di head. Guna script HTML ini adalah untuk merefer blog anda ke versi mobile jika pengguna mengakses blog anda tersebut via perangkat bergerak. Perhatikan gambar berikut ini.

Setelah menempatkan script HTML tersebut, tugas anda membuat blog yang mobile friendly sudah selesai. Anda bisa menguji apakah langkah yang anda lakukan benar atau salah dengan mengunjungi blog anda secara mobile dengan smartphone. Selamat mencoba, Go Mobile!
]]>1. Download paket WordPress berbahasa Indonesia di sini: http://svn.automattic.com/wordpress-i18n/id_ID/l10n/l10n-wp-id_ID-3.3.zip.
2. Unggah paket tersebut ke hosting anda, kemudian ekstrak ke folder instalasi WordPress anda. Anda bisa upload dan extract pakai software FTP ATAU upload dan extract file melalui File Manager sebagai fitur bawaan cPanel.

3. Berikutnya silakan cek direktori wp-content untuk memastikan apakah di dalamnya sudah terdapat folder languages.

4. Edit file wp-config.php WordPress anda (biasanya letaknya sejajar dengan file index.php WordPress). Kemudian temukan baris code berikut:

5. Ganti menjadi:

6. Kemudian SAVE. Sekarang login ke halaman dashboard anda. Bila sudah berhasil maka secara otomatis default bahasa inggris anda akan langsung beralih ke bahasa Indonesia.
]]>Direktori WordPress Plugin ini tidak terlalu user-friendly dalam menyajikan plugin dinilai populer dan tertinggi. Jadi saya pikir bahwa daftar 100 plugins wordpress terbaik ini sangat perlu untuk Anda yang berkecimpung dalam dunia WordPress. Nikmatilah!

Domain merupakan alamat yang akan menjadi identitas dari situs atau blog yang kita buat. Ada banyak macam jenis domain, .com merupakan domain yang paling populer saat ini. ada juga .net, .co.id, .info, .web.id dsb. Tapi yang menjadi permasalahan adalah semua domain tersebut berbayar alias tidak gratis. Bagi blogger yang sudah memiliki penghasilan mungkin tidak masalah karena harga dmain memang sebenarnya tidak terlalu mahal. Namun bagi blogger yang baru mulai ngeblog, menyewa hosting akan menjadi suatu masalah tersendiri..
Domain merupakan alamat yang akan menjadi identitas dari situs atau blog yang kita buat. Ada banyak macam jenis domain, .com merupakan domain yang paling populer saat ini. ada juga .net, .co.id, .info, .web.id dsb. Tapi yang menjadi permasalahan adalah semua domain tersebut berbayar alias tidak gratis. Bagi blogger yang sudah memiliki penghasilan mungkin tidak masalah karena harga dmain memang sebenarnya tidak terlalu mahal. Namun bagi blogger yang baru mulai ngeblog, menyewa hosting akan menjadi suatu masalah tersendiri..
1. buka situs co.cc
2. isikan nama domain yang kamu inginkan di kolom yang disediakan. kemudian klik check availability
3. satu hal yang harus anda ketahui adalah tidak semua nama domain disediakan scara gratis. banyak juga yang harus bayar. Jika nama domain anda ternyata tidak gratis, anda klik tombol back dan pilih nama lain sampai anda menemukan yang gratis.
4. Jika nama domain kamu tersedia dengan gratis, langsung saja klik continue to registration
5. create new account
6. isi data2 yang diperlukan dan sumit
7. setelah domain anda selesai dan jadi anda harus segera setup domain anda karena jika dalam waktu 48 jam tidak anda setup, maka anda dianggap membatalkan domain tersebut.
8. klik setup
9. pilih DNS management
10. isi nameserver 1 dan nameserver2 sesuai dengan nameserver hosting anda.
11. Tunggu prosesnya kurang lebih 48 jam, maka keseluruhan proses telah selesai dan anda mempunyai domain gratis yang cantik di www.namaanda.co.cc
]]>
Akhir-akhir ini saya seringkali gonta ganti css blog.Jika kamu mengira bahwa saya sedang memperbagus tampilan blog,kamu salah sob ![]() karena tampilan blog saya yang sekarang sangat standar.Semua hanya demi mewujudkan mimpi memiliki blog dengan SEO Friendly.Dan akhirnya css inilah yang akan saya pakai untuk beberapa abad kedepan hehehe…
karena tampilan blog saya yang sekarang sangat standar.Semua hanya demi mewujudkan mimpi memiliki blog dengan SEO Friendly.Dan akhirnya css inilah yang akan saya pakai untuk beberapa abad kedepan hehehe…
Baiklah,saya akan ungkap kegiatan saya beberapa hari terakhir ini didunia maya.Semoga sobat semua bersedia membacanya.![]()
Sudah beberapa hari ini saya rajin berburu artikel-artikel mengenai SEO.Perbincangan panjang saya lewat chating dengan seorang blogger yang rajin mengikuti kompetisi SEO,memotivasi saya untuk lebih dalam mempelajari ilmu SEO itu sendiri.Untuk blog MWB,tentu tidak semua ilmu SEO dapat dipraktekkan karena beberapa keterbatasan pada hostingan ini.Namun jangan berputus asa karena pada dasarnya MyWapBlog sudah cukup mudah ditemukan di mesin pencari tinggal bagaimana kita memaksimalkan ilmu SEO yang mungkin untuk dipraktekkan di MyWapBlog.
Balik lagi obrolan saya dengan seorang blogger,hal pertama yang ia tanyakan adalah,”sudah valid kah css blog kamu?”.Sebenarnya dulu saya sudah pernah melakukan pengecekan validasi css dengan memasukan alamat css blog kita di Css Validator ,saat itu banyak sekali terjadi error pada css blog saya tapi mungkin karena tidak tau pentingnya hubungan css yang valid dengan kualitas SEO,saya hanya cuek dan membiarkan css tetap dalam keadaan kronis toh tidak ada pengaruhnya pada tampilan blog saya.Namun setelah obrolan beberapa hari yang lalu,saya baru sadar bahwa hal ini sangat penting mengingat google yang selalu memperhatikan segala sesuatunya dengan detil.Selain itu,semua blog yang menjuarai kompetisi blog berdasarkan SEO,pastilah memiliki css blog yang valid meskipun sebagian blogger menganggap validasi css bukanlah hal yang penting.Namun jika kita bertanya pada mereka yang ahli masalah SEO,jawaban mereka sudah pasti seragam yaitu validasi css adalah penting untuk kualitas SEO.
Setelah memahami hasil obrolan itu maka saya segera merombak css blog ini dan bertekad menjadikannya valid.Sebelumnya ada sekitar 25 elemen eror yang terdeteksi dan alhamdulillah sekarang css blog saya telah dinyatakan valid .Selain itu,hal ini jugalah yang membuat saya ragu untuk menjadikan tampilan blog ini serupa wapsite yang mewah karena akan menimbulkan semakin banyak error pada css nya kecuali bagi mereka yang sudah paham betul tentang css.Saya pernah melakukan pengecekkan validasi css pada sebuah blog MWB dengan tampilan yang luarbiasa bagus.Dan hasilnya bukan eror lagi tapi dokumen css blog tsb ditolak mentah-mentah oleh Css Validator .
Ada tiga hasil yang ditemukan ketika melakukan pengecekan validasi css yaitu Error,Warning dan Validated Css.Error adalah bagian css yang rusak,Warning boleh diabaikan karna ini hanya peringatan.Pada Blog saya terdapat 2 warning karena ada dua warna yang sama pada elemen navigasi yang sengaja saya seragamkan untuk menghilangkan nomor pada tampilan navigasi tapi ini tidak berpengaruh karena css saya tetap dinyatakan valid.Sedangkan Validated Css menampilkan bagian css kita yang penulisanya benar/valid.
]]>Photum is a theme to use with WordPress that will turn your site into a clean portfolio that you can use to show off your photos. We have designed it to be neutral and clean so your work can stand out.

Pronto is a very clean and minimal Free Masonry Gallery WordPress theme created by WPExplorer.com that’s perfect for blogs and portfolios.

Bizz is a free premium like business and portfolio WordPress by WPExplorer with a clean minimal and professional design. The theme comes with unlimited portfolio support, prettyPhoto built-in, blog section, extended footer and more.

Visual WordPress Theme is a grid like theme with slider option. Great for displaying your portfolio on main page. This is perfect theme for any designer to showcase their portfolio and blog about their work.

Exhibition Theme is clean and modern WordPress theme with a blog like design. This is perfect theme for any artist to showcase their portfolio and blog about their work

Beautiful minimal and modern WordPress themes. Design for illustrators, photographers and graphic designers.

Grid Portfolio Theme is clean theme with grid like layout, this WordPress theme is perfect to showcase any portfolio. Grid Portfolio has nice and unique structure to show any artwork.

Beautiful minimal and modern WordPress themes. Design for illustrators, photographers and graphic designers. The focus should be on your Work not the theme.

Calomino Magazine free Business, Magazine WordPress Theme.

Famiret Mag free Cool, Magazine, Personal WordPress Theme.

Marolitos Magazine free Blog, Magazine WordPress Theme.

Mangos free Blog, Personal WordPress Theme.

With this theme you can host your own Job board for free. Registered users can submit job listings on your site and an admin can review and publish it.

Myst is a nice minimal magazine wordpress theme. It is suitable for magazine sites or tutorial sites. The large featured images on the index page makes it even an ideal photoblog theme.

Leon is my first fully responsive wordpress theme. What is a responsive theme? A responsive theme means it will adjust the theme layout according to the screen size of the media.

Basic is a new free theme suggested by many users. The purpose of the Basic theme is to give you a starter theme ao you can be your own designer. It only contains the basic layout styling so you can customize the theme with your own perferences using the Themify option panel.

Very elegant, clean and fast loading WordPress theme with minimalistic approach. Super design with premium functions for free.

Very elegant, clean and fast loading WordPress theme with minimalistic approach. Super design with premium functions for free.

Very elegant, clean and fast loading WordPress theme with minimalistic approach. Super design with premium functions for free.

A responsive and accessible theme that’s not afraid to use modern web technologies.


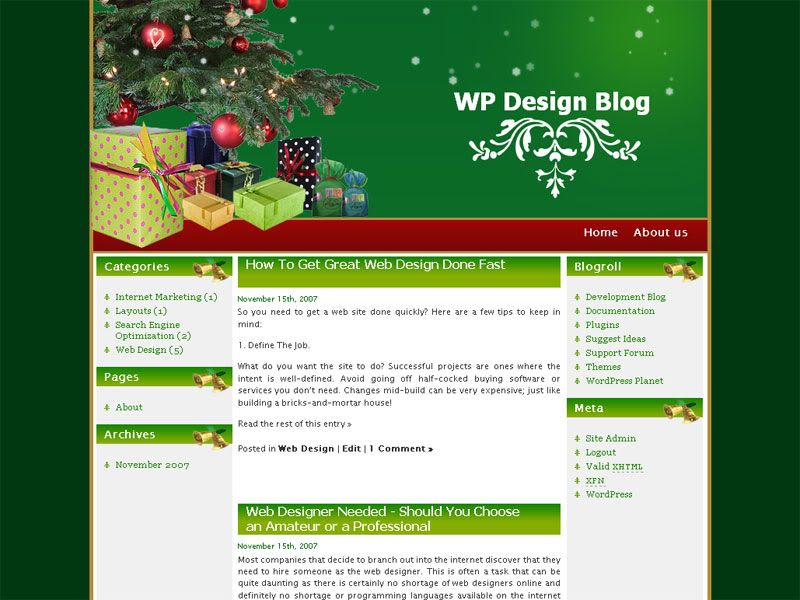
Christmas is here again, and it’s time to hang lights, ornaments and socks around.
If you are a WordPress user and wants some holiday feel on your WordPress blog, I have compiled 30 Christmas WordPress themes here. Some of them are awesome, while some not so pretty.
Provided I did not miss anything, all of them are free to use. Please let me know if there are any other Christmas WordPress themes should be in the list.
Happy Christmas-ing your blog!
1. Merry Christmas [Demo]

Elegant, single column with snow falling effect. One of the best Christmas themes out there.
2. Christmas Days [Demo]

2 columns, tested on WordPress 2.3.1 with Firefox , Opera, Safari and IE6/7, validates as XHTML 1.0 Transitional.
3. Christmas Is Near [Demo]

2 columns, blue themed, with snow falling effect.
4. Iceburgg

Blue and white themed, one column but splitting into three columns right before the footer.
5. TMZ Winter

3 columns, combination of red, blue, green and white. PSDs included in download.
6. Vermilion Christmas [Demo]

Widget ready, 2 columns, green and red.

Widget ready, AdSense optimized, 3 columns, easy header change.
8. Winter Christmas [Demo]

3 columns, right sidebar, widget ready, support Gravatar, rounded corner.
9. Christmas Gifts [Demo]

Widget ready, 2 columns, white, red and green.
10. Christmas Gift [Screenshot]

3 columns, left and right sidebar, widget ready.
11. V4nyChristmas3 [Demo]

Cute doggy header, 2 columns, (very) narrow content column.
12. Christmas News [Demo]

3 columns, left and right sidebar, green background, blue header.
13. Coolwinter [Demo]

Blue, winter theme, 2 columns, right sidebar.
14. Xmas Theme [Demo]

Red and green, 2 columns, sponsored by Lunarpages.
15. Winter Red [Demo]

Holiday mood red theme, 3 columns.
16. A Day Of Meaning And Traditions [Demo]

2 columns, AdSense ready.
17. Hello Snowman [Demo]

3 columns, clean looking, snowman header, Gravatar ready, widget ready, rounded corners at footer.
18. Christmas Girl [Demo]

3 columns, fixed width, widget ready, Christmas girl on header.

Orange themed, 3 columns.
20. Winter Stream [Demo]

2 columns, fixed width, widget ready – more to winter than Christmas.
21. Christmas Spirit [Demo]

3 columns (for some reason demo blog has only 2 columns), widget ready, not much Christmas feel, just some Christmas icons hanging around.

2 columns, red. Everything But the Fruitcake is a Christmas theme for the Christmas season. The theme includes a Christmas tree ornament graphic as well for a proper flavor.
23. Christmas & Holiday Season [Screenshot]

2/3 columns, widget ready, header PSD included.
24. ‘Tis The Season WordPress Theme

Designed by Brian Gardner, 2 columns.
25. Christmas Bells

2 columns, red background.
26. Christmas 2008 [Demo]

27. Christmas Tree

2 columns, red background, similar to Christmas Bells.
28. Christmas Cambledyne [Demo]

2 columns, widget ready, fixed width, classic looking.
29. ChristmasJoy [Demo]

2 columns, Christmas light, crammed text.
30. The Lingering Season [Demo]

2 columns, blue. Rather lonely and not so Christmas feel.
]]>Much like any website, there are actions to making your Blogger site have higher search engine rankings. The first thing you’ll want to look at is where your blog will be hosted with Blogger – take a look at our post on subdomains vs. subdirectories for SEO best practices there. From there we’ve put together a quick list of customizations and best practices to help you get the most out of your Blogspot Blog. Many people who use Blogger are fairly new to blogging and to SEO, so we’ve tried to compile a list of tips that will help you go beyond Blogger-specific customizations to drive more and better qualified traffic to your Blogspot site.
Simple Title
Keep it short and simple. Long titles can be confusing and forgetful. Make it unique and something no one else has. You should take into account important keywords to make for easier search indexing.
Keywords in Description And Meta Tags
The description should be a quick blurb of what the theme of your blog is all about. It should contain your primary keywords and be a complete sentence.
Send Pings
There’s a great and super user-friendly tool that will send and update your blog posts to multiple search engines, called Ping-O-Matic. This service will even ping specialized services if they are relevant to your blog.
Make Separate Post Pages
This will make it further accessible for search engines to crawl and identify the relevancy of your page. It also enables each of your blog posts to attract different kinds of visitors. You should archive new posts weekly.
Use A Blog Archive Gadget
This allows you to add internal links to other blog pages. This is not nearly as difficult as it may sound; all you need to do is go to your Blogger account, click on the link that says “Design”, then click the “Add a Gadget” tab on the displayed sidebar then choose the “Blog Archive” gadget and hit Save. It’s that simple. Every time Google or another search engine crawls through your Blogger site it will find these other pages because of this gadget.
Organize comments
Comments are important. People are naturally attracted to things other people find interesting. It is important to encourage commenting by asking questions in your blog or putting up interesting topics. On the other hand, not all the responses you receive will be good for your site. You should always show your comments, but delete the short, meaningless comments or the ones that are completely unrelated to your topics.
Switch the Blog Title to the Post Title on the Post Pages
If you go to one of your blog post pages you will notice the title will appear something like this: “Your Blog Title: Your Blog Post Title”. For search engines to index your site more effectively, the Blog Post Title should come first. To do this, you will have to alter the HTML code. First, click on the Design tab, then Edit HTML. The title will appear like this:
<title><data:blog.pageTitle/></title>
When you see this code, go ahead and edit the code to look something like this:
<b:if cond=’data:blog.pageType == “item”‘>
<title><data:blog.pageName/> – <data:blog.title/></title>
<b:else/>
<title><data:blog.pageTitle/></title>
</b:if>
Now, the Post Title and Blog Title should be reversed like this, “Your Blog Post Title: Your Blog Title”. This will allow your blog post to appear first on search results.
Submit Your Sitemap To Google Webmaster Tools
While search engine submission tools are no longer useful, sharing a site map with Google can help ensure that all of your blog’s pages are crawled and discovered. After all of your hard work you’ll want to make sure your blog is easily visible and searchable. A great way to ensure your pages and posts are indexed by search engines is to use Google Webmaster Tools. It’s completely free and easy to use. Just go to www.google.com/webmasters/tools/ and submit your URL and follow the instructions given.
Submit Your Blog To Directories & Start Building Links
There are plenty of blog directories out there if you look (be sure you understand the difference between a directory and a paid link). They will ask for the category of your blog topics, so it makes searching for your blog easier and more observable to the public, and these along with traditional links have a lot of SEO value. If you’re at a loss for which directories to target and which links to build, this is something that you can get some initial ideas around in the free trial of DIYSEO.
Use Anchor Text
Anchor text is the word(s) you use as a back link to another page. When creating a back link use some of your primary keywords as the anchor text.
<a>href=””>Anchor Text<a/> – >
Alt Tags for Images
Search engine crawlers can sometimes get stumped by images within a blog. Images are great to have and add character to a blog so it is good idea to include them, plus use <alt> tags to get the best of both worlds. Alt tags should be a very brief description of the image shown and try to include keywords when possible. It should look like this,
<img src=”imageurl” alt=”description of the image shown”/>
Finally and Most Importantly,
Content
Write frequently to keep you blogs fresh and up to date. Always write with the readers’ interests in mind and come up with unique, creative and interesting content. This will keep readers coming back and allow for more linking and word of mouth for your blog. Of course, exclusive material will expectedly be on top of search engines opposed to those who copy and paste content.
As you can see, this list is pretty basic. Blogger SEO is not nearly as complex as it seems. Everything I have mentioned is pretty straightforward, but it does take effort and vigilance to keep your blog SEO happy. Once you have mastered these steps, your Blogger site should be ready for web traffic in no time. The best advice I can give is to have fun with it and make it less of a chore and more of an exciting challenge.
Good Luck!
]]>